
[ad_1]
Hello, dear!
The other day I was talking to an acquaintance – an interesting man, far from the subject of IT by profession, but actively interested in new gadgets and constantly surfing the Internet. General topics about life somehow flowed easily into conversations about hobbies, training, and imperceptibly into discussions about podcasts.
- I myself am constantly listening, listening. And I think, why am I worse? I have a lot on my mind, it’s time to tell myself!
- Do you want your own podcast, or what?
- Want! All you need is a microphone. Well, you understand, so advise me, just a capacitor!
- Why “just”?
- They are better, you know.
- no. There are microphones that are better designed for a particular task. And a good dynamic fit for your podcast is…
Then there was a discussion. An acquaintance argued, brought videos with a condenser microphone in the frame, some reviews, I drew my arguments. As a result, he left to think, and I, for my part, decided to do an experiment: record the same text on two types of microphones at the same time in an ordinary apartment, where the walls There is no acoustic treatment, special sound-absorbing screens, vocal processors, dynamic processing and such “an average place on the computer”.
Here are two examples. Both are recorded at 44 kHz / 16-bit, which is more than adequate for “audio” content. No processing or enhancement was done on them; In the microphone applications settings, everything was also set to the most neutral possible option; All that was done was to eliminate the extra silence so that the examples were equal in duration. Of course, I will not indicate which models were used in the test, so as not to cause unnecessary disassembly and comparison – it is worth preparing several separate materials for this, and before that, from somewhere. Find the missing microphone. For now, my goal is to listen for myself and show you how the sound differs fundamentally between different types, and what you can expect and what you should be prepared for when recording.
The first thing you can immediately hear is the voice delivery. Yes, the sound sounds almost identical, and the difference is only noticeable when comparing the two recordings directly. But still, a dynamic microphone, due to its design (by the way, if you haven’t read about the characteristics of different types, be sure to read the article on the site!) captures less high-frequency sounds, and recording At times, many quick clicks, “clicks” and other elements that, however, can hardly be called useful. So if you often get “wet” sounds like smacking and the like, selecting the Dynamic option will help improve the picture. But for all kinds of ASMR – the ones where all sorts of silent sounds are exaggerated – you should definitely go for the condenser option.
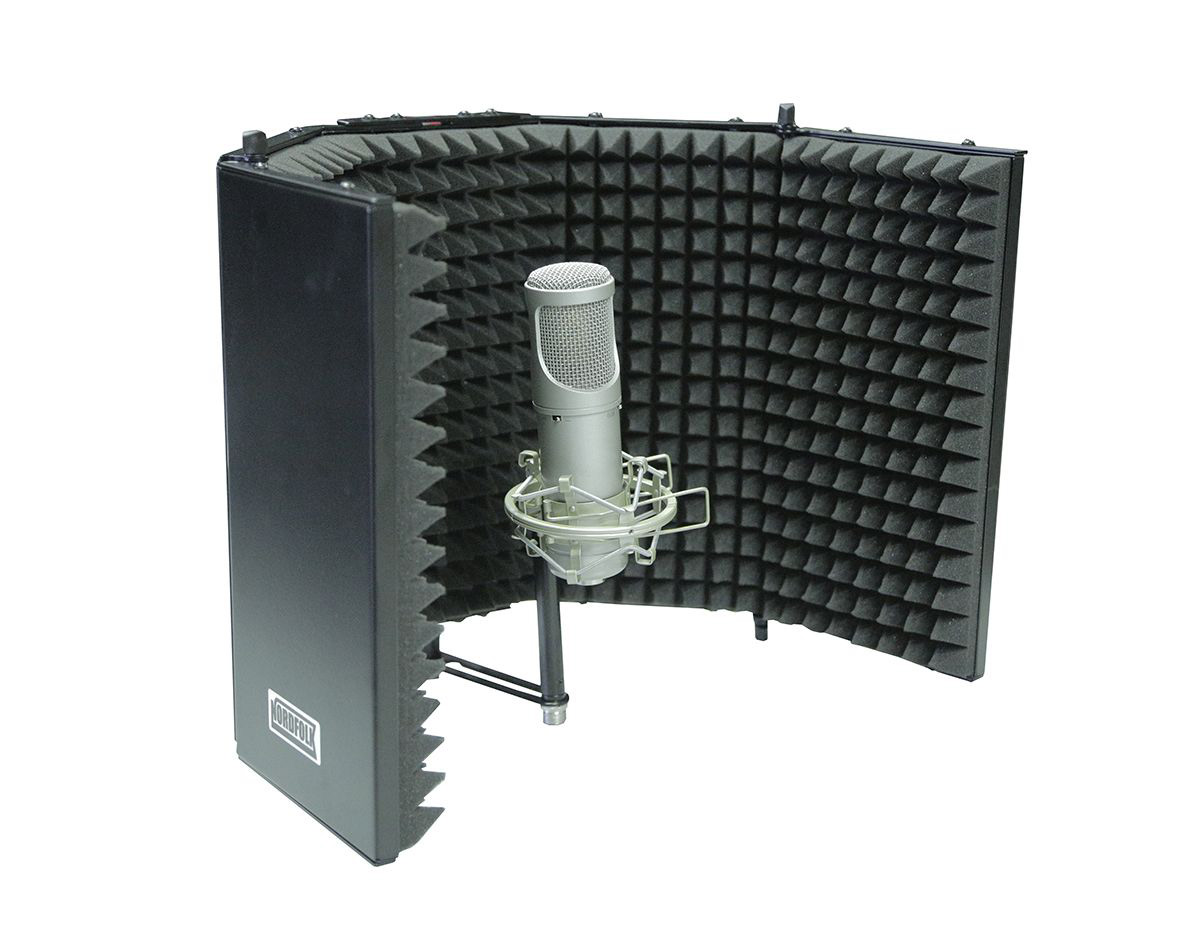
Yes, I don’t discount the usefulness of the pop filter in any way – there is a special sound permeable screen installed in front of the microphone and it is designed to resist explosive sounds in the first place and saliva droplets in the second. Is. This is required, especially for capacitors, but the choice of model must also be approached judiciously – so that the material from which it is made does not suppress the HF component of the sound too much. By the way, there are no pop filters to explain in the examples.
The second is what can be called “room recording”: with a dynamic microphone, the sound is dry, without reflection, it is considered conditionally suspended in the air, isolated from the surroundings, the volume of the room or its The configuration of is impossible. Imagine that with a condenser, sound is amplified by reflection from walls and ceilings; You can immediately gauge the size of the room in which everything is happening, its geometry in general terms. And this is especially due to the high sensitivity that all third-party sounds, such as the noise of neighbors, the environment of the street outside the window, the conversation in the next room, etc., can produce. a problem.
These interferences not only show up in pauses, but also blend into your voice, sometimes changing it significantly. Of course, you should choose quiet places and “quiet times”, but it’s impossible to exclude situations during the day when something shrills, hisses, squeals and ruins your recording. And a harsh dynamic microphone is more likely to forgive you for it.

The image above shows the spectral distribution of frequencies in these examples, with the dip in the middle corresponding to a fragment of audio from about 1:14 to 1:27 – when I’m silent and the TV in the next room is on. A brighter, more saturated color in the condenser trough simply indicates that more sound has hit the membrane and been recorded. At the same time, for curiosity’s sake, you can see the high peaks on the right: if brightness and the proximity of white color are responsible for “loudness”, then height is responsible for frequency. The highest points rise slightly above 15 kHz. Well, in this area, there’s nothing useful for sound, so the microphone’s wide frequency range (for a podcast!) is a complete overkill in this case.
The gist is simple: you shouldn’t chase capacitor models for “just talking”. It’s best not to bother with this type at all, but focus on the highest quality option within your budget or a more successful sound card and microphone combination if you don’t want a USB cable. And also remember about the room and its acoustics!
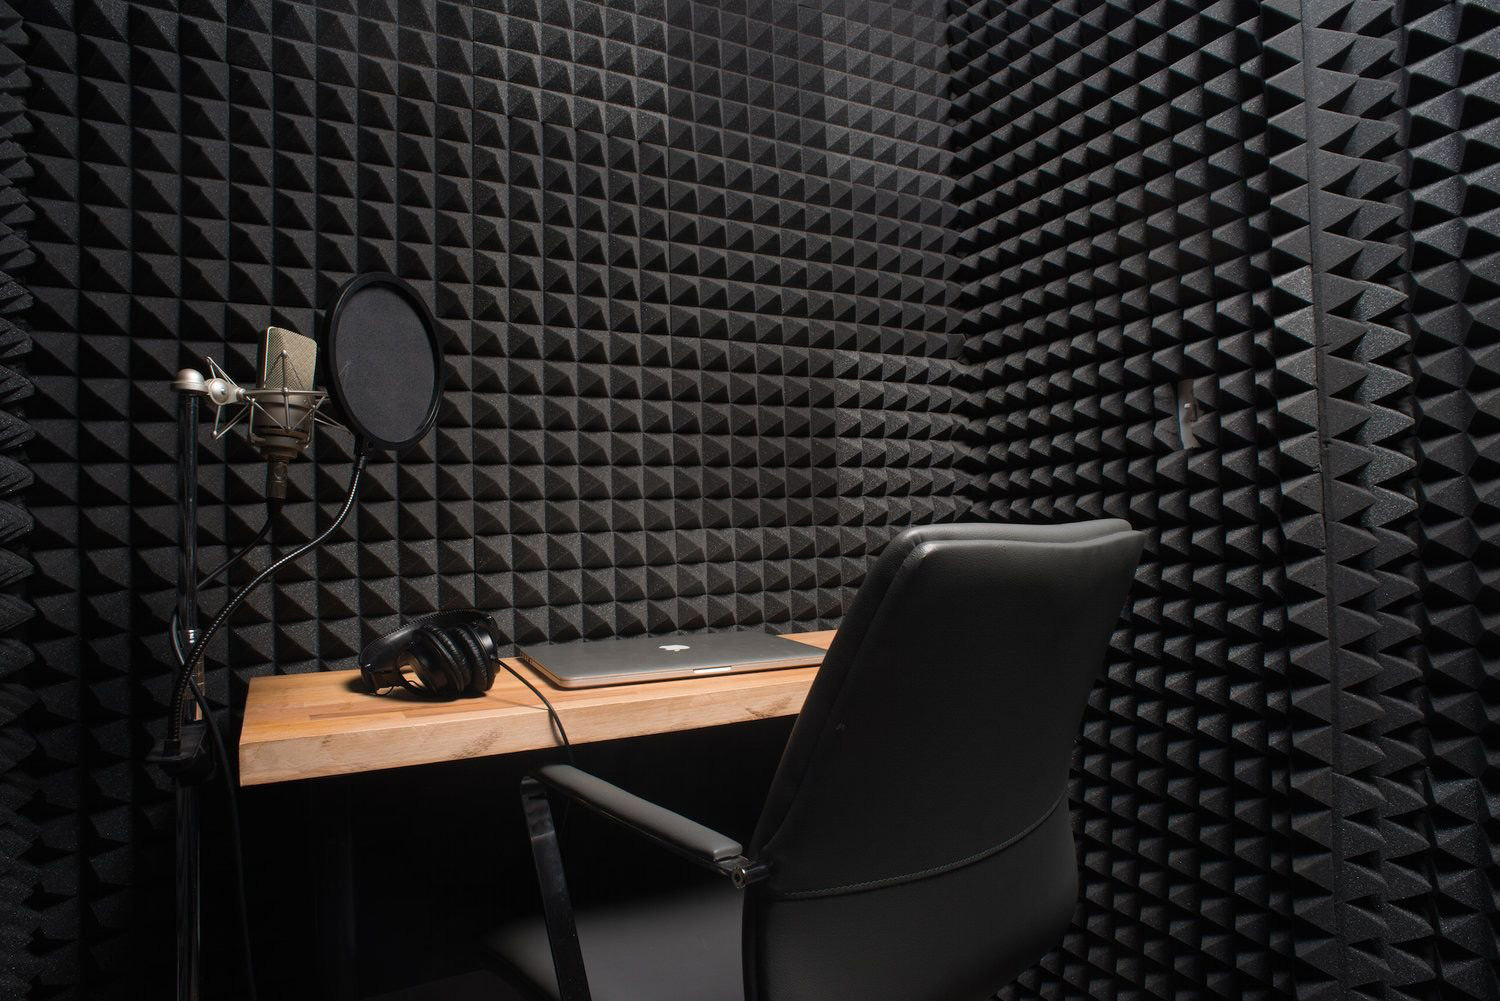
What can you do at home? First, choose a “quiet” time so that household members are not disturbed by conversations, TVs, speakers, and the like. Secondly, buy a pop filter, it’s relatively cheap (but not worth saving much on). Third, dampen the room as much as possible, either by using special sound-absorbing elements that may seem either utilitarian-intense or quite fashionably relevant, or at least around the recording site. Cover the area with fabric, curtains or similar.

As a last resort, allow yourself something useful – an acoustic shield for the microphone. It looks exactly like the picture and absorbs the sounds reflected from the walls very well. It costs significantly more than a pop filter, but it saves you fiddling with panels, especially if you’ve recently done a repair and aren’t finishing anything.
Fourth, work with speech and content. Seriously, for an interesting episode and delicious presentation, you’d be forgiven for a little (tiny!) noise at intervals, a “filmed” room, and even a lack of belief in Cthulhu. Talk about what you want and have fun. Otherwise why do all this?

